Monthly Project (April 2018)
#18 Tried and Tested : Reapplying sunscreen, is it possible?
I am intended to make this blog post a simple and sweet one, so I am going to jump right into the content asap.
Just before I proceed any further, this Monthly Project is inspired by Renée (@Gothamista) where she shared the "DIY Sunscreen Cushion For Easy Reapplication!" via her YouTube channel (like a year ago) (Check out her YouTube channel here) :D
What you can expect from this post:
What you need for this DIY:
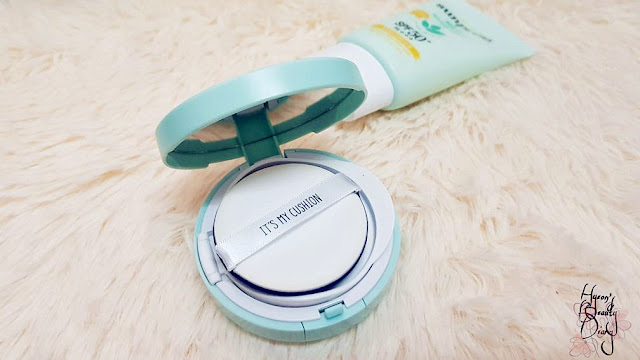
In the original DIY tutorial demonstrated by Renée, she uses two items only: It’s My's Cushion Case and Etude House's Sunprise Mild Watery Light SPF 50 PA+++.
So I did modify a bit here, by adding the moisturizing emulsion/gel - SON&PARK's Beauty Gel (to give an extra touch of moisture) and fragrance - Mamonde's Rose Water Toner (for it's rosy scent).
I will leave the price list at the end of this post. If you're intended to purchase, this is just for your reference.
Let's get started! :D
After then I realized I wasn't following closely to Renée's DIY tutorial. That's why. So I ended up adding more into it afterwards.
Peeps, do take note!!! Fill in at least 1/3 of the container.
Just before I proceed any further, this Monthly Project is inspired by Renée (@Gothamista) where she shared the "DIY Sunscreen Cushion For Easy Reapplication!" via her YouTube channel (like a year ago) (Check out her YouTube channel here) :D
What you can expect from this post:
- Easy 1-2-3 step to make your very own DIY sunscreen cushion for reapplication;
- Find out whether DIY sunscreen cushion is a HIT or MISS.
What you need for this DIY:
- Cushion case;
- Sunscreen;
- Moisturizing emulsion (optional);
- Fragrance (optional).
In the original DIY tutorial demonstrated by Renée, she uses two items only: It’s My's Cushion Case and Etude House's Sunprise Mild Watery Light SPF 50 PA+++.
So I did modify a bit here, by adding the moisturizing emulsion/gel - SON&PARK's Beauty Gel (to give an extra touch of moisture) and fragrance - Mamonde's Rose Water Toner (for it's rosy scent).
I will leave the price list at the end of this post. If you're intended to purchase, this is just for your reference.
Let's get started! :D
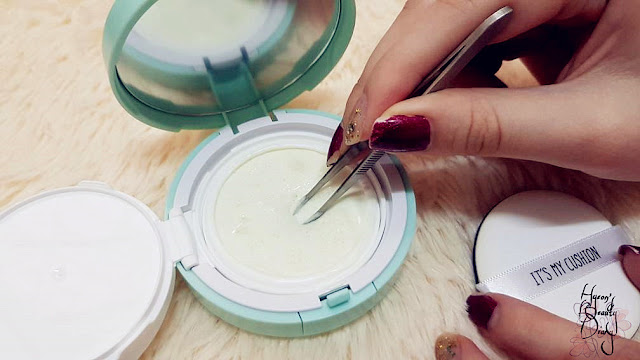
Step ① Remove the cushion from the container.
This step is quite self-explanatory. Pretty straightforward.
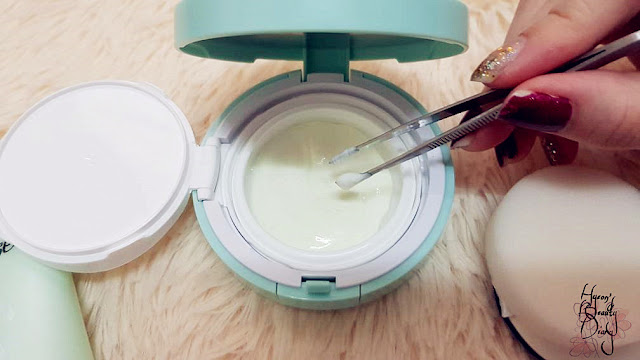
Hygiene per say, do recommended to use a tool (i.e. tweezers) rather than bare hands. Make sure the tool is clean.
Hygiene per say, do recommended to use a tool (i.e. tweezers) rather than bare hands. Make sure the tool is clean.
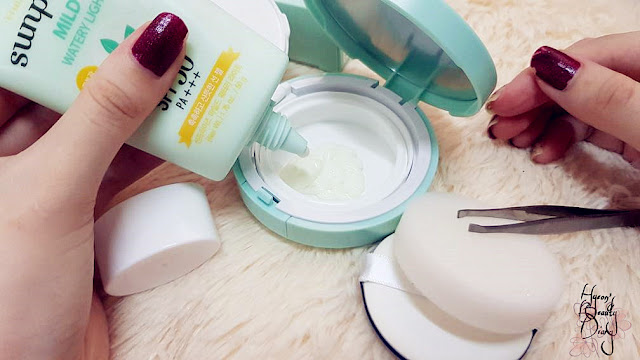
Step ② Fill in the sunscreen into the container for about 1/3 (generously!!!).
I do agree with Renée's selection of sunscreen. Etude House's Sunprise Mild Watery Light SPF 50 PA+++ is definitely a great choice because of it's thin/light formula, 100% mineral-based sunscreen; besides, it leaves no white cast.
Nonetheless, I was quite reserved at this point as I didn't pour as much as 1/3 of the container at the first-attempt.
After then I realized I wasn't following closely to Renée's DIY tutorial. That's why. So I ended up adding more into it afterwards.Peeps, do take note!!! Fill in at least 1/3 of the container.
Step ③ Add 1-2 full pumps of moisturizing emulsion/gel (optional).
In fact, this step was not included in the original DIY.
I added a few pumps of moisturizing emulsion with the intention of replenishing moisture to the skin during reapplying sunscreen.
Often my skin appears flaky throughout the day, especially during hot and humid days.
SON&PARK's Beauty Gel has the cooling and moisturizing potential at the same time, so that's why I incorporated this product into this DIY.
It's absolutely optional, depending on your preference.
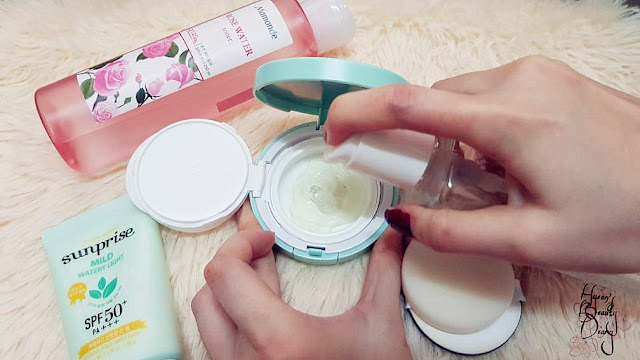
Step ④ Add a few drops of fragrance (optional).
In spite I often commented that I hate artificial laboratory kind-of fragrance, I really adore the rosy sweet scent from Mamonde's Rose Water Toner. The relaxing rosy scent helps sooth tiredness.
Just a few drops will do, not too much until the formula becomes watery.
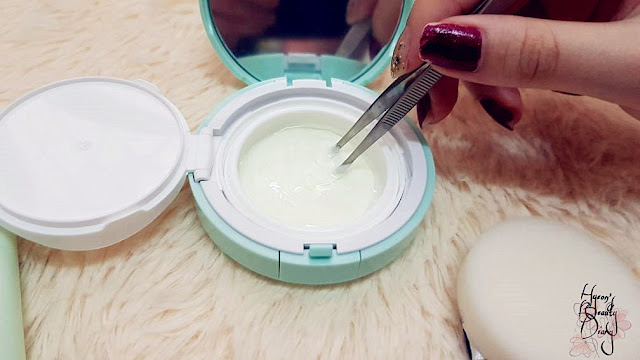
Step ⑤ Give it a good mix.
Give it a flip.
Step ⑥ Put back the cushion into container.
***
Ta-da!!! Here you go. Your very own DIY Sunscreen Cushion (limited edition too)! :p
Let's give it a try and see if it delivers what it claims.
From the look at the cushion puff, I can already tell that it is super moisturizing! Can't wait to try on my skin!
As you can see (below) at the back of my hand, it leaves water marks on top of the skin where I just applied the DIY sunscreen cushion.
Definitely moisturizing, but I am just curious about its sun-protection power after the modification. :/
And there is one way to find out...
Fast forward the time to 3 months later...
And as I am sharing with you now, this is an experience talk from what I have observed throughout the testing period.
No doubt, the modified sunscreen cushion viscosity was watery and it feels like nothing of the original sunscreen texture while reapplying on the skin.
I do enjoy the cooling effect from it, but I'm not too sure am I getting the same sun-protection as I reapplying it.
Hence, I added more sunscreen into the container to balance out the watery viscosity earlier.

Now I carry this sunscreen cushion around in my bag and I can reapply sunscreen whenever needed, on top of my makeup.
I wouldn't say it is a total hit, but as much as I adore its brilliant idea and execution, it is quite an item. ;)
If you would like to read more posts like this, do leave a comment below and let's interact! :D

Fast forward the time to 3 months later...
And as I am sharing with you now, this is an experience talk from what I have observed throughout the testing period.
No doubt, the modified sunscreen cushion viscosity was watery and it feels like nothing of the original sunscreen texture while reapplying on the skin.
I do enjoy the cooling effect from it, but I'm not too sure am I getting the same sun-protection as I reapplying it.
Hence, I added more sunscreen into the container to balance out the watery viscosity earlier.

Now I carry this sunscreen cushion around in my bag and I can reapply sunscreen whenever needed, on top of my makeup.
I wouldn't say it is a total hit, but as much as I adore its brilliant idea and execution, it is quite an item. ;)
If you would like to read more posts like this, do leave a comment below and let's interact! :D
'Til the next time. Cheers!☺☺☺
Etude House's Sunprise Mild Watery Light SPF 50 PA+++ RM36
SON&PARK's Beauty Gel RM112
Mamonde's Rose Water Toner RM48
Price List from Althea :
It’s My's Cushion Case RM23Etude House's Sunprise Mild Watery Light SPF 50 PA+++ RM36
SON&PARK's Beauty Gel RM112
Mamonde's Rose Water Toner RM48






Post a Comment